WB6NVH.com
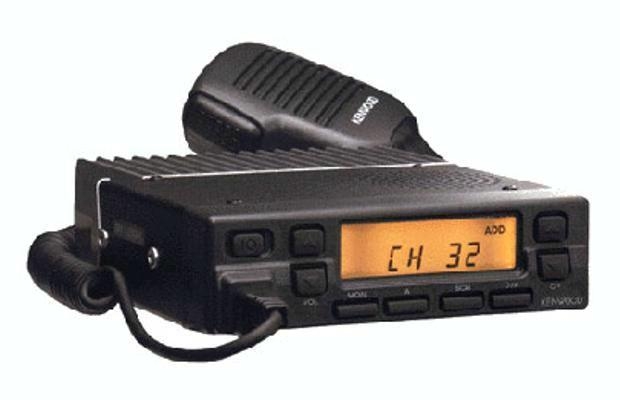
KENWOOD TK 760H ( AND OTHERS)
Front Panel Programming Tutorial
How to use Kenwood KPG 29D Software
I created this page because I found the other pages on the web about this subject confusing or incomplete. Thus this page is intended to be used with the other pages rather than by itself. You will need to locate the jumper to enable front panel programming via one of these other pages, as the radios brought to me have already had this modification done.
The Kenwood TK760 and 760H (and TK- 762/762H, 768/768H, 860/860H, 862/862H, 868/868H) are all intended to be programmed by the dealer, using a laptop PC. However, by adding a jumper on the circuit board in the front section of the radio and then enabling the "Dealer / Tuning" mode with the software during programming, they can then be programmed using the buttons on the front panel, in the field, which will at least initially require using a "cheat sheet" to determine which buttons do what during front panel programming.
You will need the dealer programming cable, normally a DB9 to Modular RJ Series assembly (Kenwood KPG-4,) the Kenwood KPG 29D software, and an older PC that can run DOS as well as Windows. This means preferably a Windows 98 or 95 machine. Not XP and later. XP has no "reboot in DOS" mode and most XP computers may be too fast and cause problems with this old software. The procedure described below assumes you have a PC that is running Windows 98. You can also use a very old PC that only has DOS in it, but in that case you will have to use another PC to make a floppy of the KPG29D folder and then transfer the folder from the floppy into the PC's C: Drive.
Please note that the G models do not program or modify in the same way. This information is only for the no-suffix and H models.
INSTALLING THE SOFTWARE:
The first thing to do is to install the software. This is presently on a CD labeled "Kenwood KPG 29D." It was almost certainly originally available on a floppy disk, but the way you will likely get it is on a CD.
You will need a PC that can run DOS. This is old DOS software, it won't run on Windows. An ideal PC to use would be an older laptop that has a CD-ROM drive and is running Windows 98 (or 95.) The only thing you will use Windows for is to manage the files. You can use a DOS-only PC, but the process is more cumbersome, and most DOS PC's don't have drivers to run a CD-ROM reader, so you would have to transfer the software to a floppy first.
This software has no "Install" feature, at least the one I received did not. It consists of a file folder with the several software files inside that folder. The folder is labeled KPG29D. Through some analysis of the files it was determined that the software originally wanted to be on the C:\ drive as its own directory. In other words, it wants to be C:\ KPG29D . So, these are the steps I used:
1) Boot the laptop up into Windows. Click on the "My Computer" icon,
2) Click on the icon for the hard drive, whatever that has been named. This usually starts with C:\ etc,
3) You should now see a screen showing the folders (directories) that are in the C drive.
4) Minimize the screen (not close the screen) so that it can be moved over to part of the desktop
5) Now click on the icon for the CD reader until you can view the files on the Kenwood CD. This will come up in a separate window that you will probably have to also minimize so that you wind up with two windows open, side by side. The CD contents in one, and the C Drive contents in the other. If you didn't make an icon for the CD drive on your desktop already, the CD reader icon should be in the "My Computer" icon on the desktop.
6) Now right click on the file folder KPG29D in the CD drive and select "Copy" from the drop-down menu. Move the mouse over to the C: Drive contents window and right click again in a free space, selecting "paste." There should now be a KPG29D folder (directory) in the contents of the C: Drive,
7) If there is, you have now installed the software. Go to step 8 to run it.
8) Close the windows you have just been working in. Proceed to shut the computer down, but instead select 'restart in MS-DOS."
RUNNING THE SOFTWARE
1) You should now see a C:\ WINDOWS> prompt (or similar) and an otherwise blank screen now that the computer has rebooted in DOS.
2) Change the directory to the Kenwood software by typing as follows:
C:\ CD C: \KPG29D
(Note that there is no space between C: and \ . CD means "change directory." There is a space between CD and C:\ )
3) You should now see a prompt that looks like C: \KPG29D>
4) Type KPG29D at the prompt. The Kenwood software should open up and ask you to press any key.
5) You should now be in the Kenwood programming screen. To set things up, depress the ALT key.
6) The drop-down menus will now be accessible. Note that you can move across from one menu to another using the arrow keys on the PC keyboard, but only while the first drop-down menu is showing. I like a color screen, so if you have a color monitor you might want to move over to the "Display" menu and select the colors the way you like them. Note that I have so far been unable to get this selection to "stay" once the software is exited.
7) I suggest you read the contents of the radio and save it before proceeding. This is done by selecting the PROGRAM menu and picking "READ FROM RADIO." If that doesn't work or you get errors about communications, try going to the SETUP menu and selecting the COMMUNICATIONS PORT choice and then selecting "COM 2" instead of the default "COM 1." During this time you should have had the programming cable plugged into the PC and the microphone socket of the radio, with the radio turned on.
8) Assuming you were able to read the radio, save the contents to a file that you pick a name for. The software will prompt you for a name. I didn't check, but it probably has to be a name less than 8 characters long.
9) You can now enter the frequencies, CTCSS tones, wide or narrow band choice, scan list and so on on the main screen. To exit a menu, press Esc.
10) If you want to use the front panel programming, go to the EDIT menu and scroll down to the OPTIONAL FEATURES choice and then scroll down to the Dealer/Tuning option and press the space bar so that is says "enabled." There are some other options which should be self explanatory and you can select those as needed. Please note that the option you want for front panel programming is in the EDIT menu, it is not the one marked TEST MODE in the PROGRAM menu.
11) When you are all finished entering things the way you want, go back to the menu and make sure the dealer/tuning mode is enabled, as it has a strange tendency to try to go back to "disabled" when you are doing other things. Now save the file with a name you like, then go to the PROGRAM menu and select WRITE TO RADIO and load the radio with it. There will be a progress bar and you will be notified when it's finished. Then unplug the programming cable, turn the radio off, and then turn it back on again while holding down the "A" button on the radio front panel. The screen should flash PROG__ and then sel__ and the radio will have beeped once.
If so, that's it. You are now ready to front panel program it. Use the cheat sheet HERE, which is an Adobe pdf file and is for the UHF models. Just substitute VHF channels wherever it shows a UHF one, if programming the VHF radios such as TK760.
* NOTE: You may find that you can run the software while in Windows by clicking on the EXE file icon inside the KPG29D folder. This brings up a DOS window and opens the program. Don't do this because it can introduce errors or crash the program. Run it in true DOS as described above.
If the HELP screens don't work, make sure that the Help path in the SETUP menu has been set to C: \KPG29D (no spaces)
Check out this web page for more detailed data. Note as above that the TK 860 is a UHF radio but otherwise programs the same way as the 760 series, just change the 400 MHz frequencies to 150 MHz ones.
http://www.notpurfect.com/main/tk860.html
Ver. 11/18/25 © Geoffrey C. Fors All rights reserved